目录
项目描述
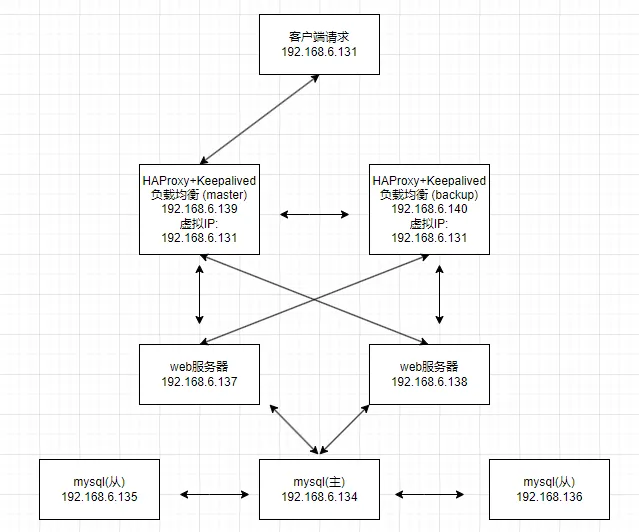
Web 前端采用 Nginx/HAProxy+Keepalived 作负载均衡器;后端wordpress采用 MySQL数据库一主多从或读写分离架构实现。
项目架构图:
前期准备
服务器准备
基于项目设计架构图, 采用共7台CentOS7.9-mini系统的VMware虚拟机。
- mysql服务器三台:
- mysql_01 192.168.6.134
- mysql_02 192.168.6.135
- mysql_03 192.168.6.136
- web服务器两台:
- web_01 192.168.6.137
- web_02 192.168.6.138
- 负载均衡服务器两台:
- lb_01 192.168.6.139
- lb_01 192.168.6.140

系统环境准备
ssh工具
- 这里使用的ssh工具是Termius, 可以同时操控多台服务器, 减少了重复工作
broadcast input快捷键:ctr+alt+b
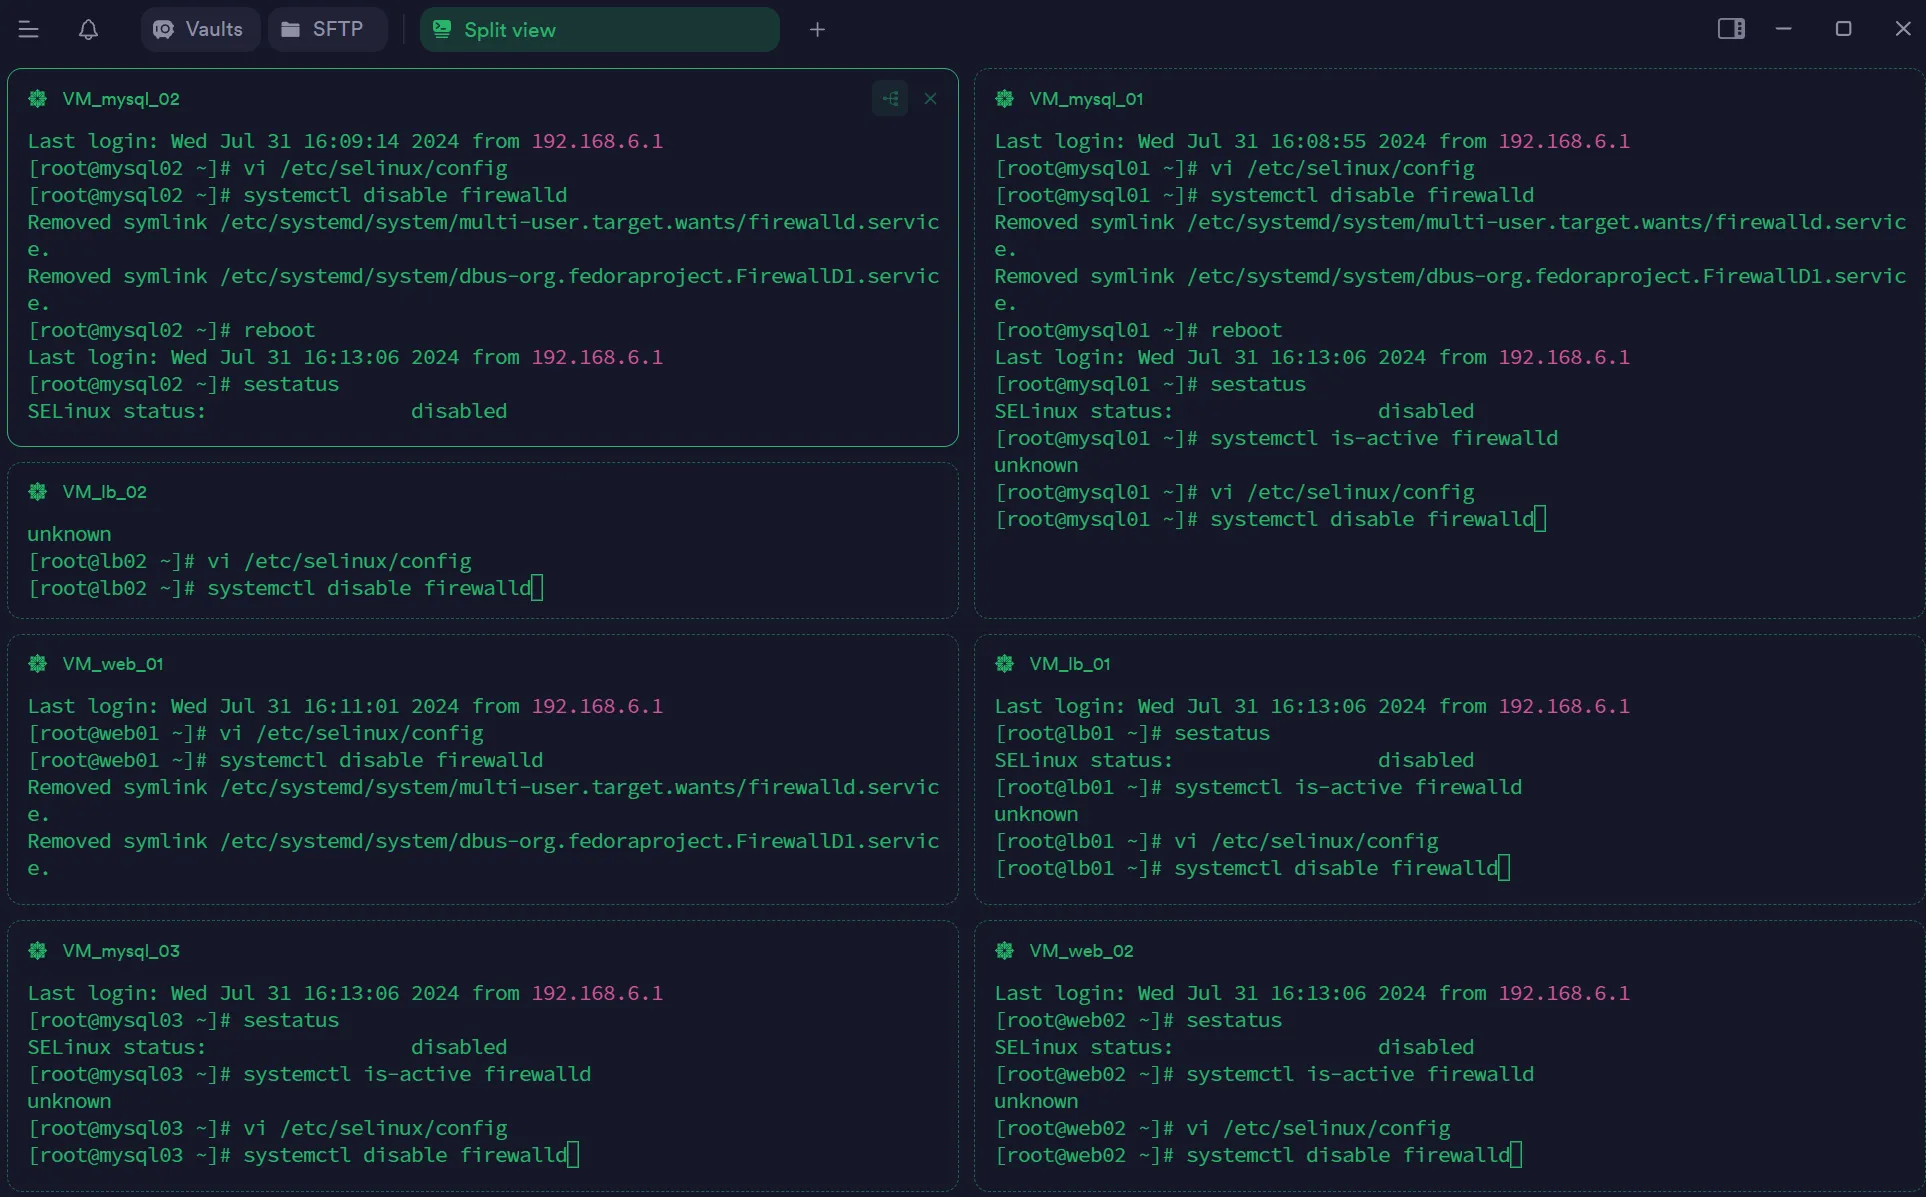
(所有服务器)关闭selinux及防火墙
bashvi /etc/selinux/config
SELINUX=disabled

systemctl disable firewalld
reboot
- 重启系统后查看selinux及防火墙状态
bashsestatus
systemctl status firewalld
(所有服务器)换yum源
bashcd /etc/yum.repos.d/
ls
mkdir back
mv *.repo back
curl -o /etc/yum.repos.d/CentOS-Base.repo https://mirrors.aliyun.com/repo/Centos-7.repo
yum clean all
yum makecache
- 进入
/etc/yum.repos.d/目录。 - 使用
ls命令列出当前目录下的文件列表,确认有多个.repo结尾的文件。 - 使用
mkdir back命令创建一个名为 "back" 的新文件夹。 - 使用
mv *.repo back命令将当前目录下所有以.repo结尾的文件移动到新创建的 "back" 文件夹中。 - 使用
curl -o /etc/yum.repos.d/CentOS-Base.repo https://mirrors.aliyun.com/repo/Centos-7.repo命令从阿里云的镜像地址下载CentOS-Base.repo文件并保存到/etc/yum.repos.d/目录中。 这里你执行了两个命令来清理和更新 YUM 软件包缓存: yum clean all:这个命令用于清理 YUM 软件包缓存。在这个过程中,它会清理所有已下载的元数据和软件包缓存,以便后续重新下载最新的信息。yum makecache:这个命令用于重新生成 YUM 软件包缓存。它会重新下载软件包列表和元数据,并将其缓存起来,以便后续的软件包安装和更新操作能够更快速地进行。
(所有服务器)同步时钟
bashyum install ntp ntpdate -y
ntpdate cn.pool.ntp.org
hwclock --systohc
yum install ntp ntpdate -y:这个命令使用 YUM 包管理器安装了 NTP(Network Time Protocol)和 ntpdate 软件包。选项-y表示在安装过程中自动应用所有的确认提示,以便无需手动确认安装。ntpdate cn.pool.ntp.org:这个命令使用 ntpdate 工具从中国的 NTP 服务器(cn.pool.ntp.org)同步系统时间。hwclock --systohc:这个命令将系统时间写入硬件时钟,以便在系统重启后能够保持正确的时间。
- 可以使用
date命令检查时间是否已经同步成功
(所有服务器)安装必要的软件
bashyum install gcc gcc-c++ wget telnet net-tools make unzip vim -y
gcc:GNU Compiler Collection,用于编译和构建 C 语言程序。gcc-c++:C++ 编译器,用于编译和构建 C++ 程序。wget:用于从网络上下载文件的工具。telnet:用于通过 Telnet 协议远程登录到其他服务器的工具。net-tools:提供了一些网络管理工具,如 ifconfig、netstat 等。make:用于自动化构建和管理程序的工具。unzip: 是一个常用的命令行工具,用于解压缩zip格式的压缩文件。vim: 是一款功能强大的文本编辑器,常用于在终端环境下编辑文本文件。
数据库层 - 搭建mysql主从复制
(所有Mysql)服务器编译安装mysql并进行基础配置
- 下载mysql安装包
- 在mysql下载msyql相应安装包
- mysql官网
- 将mysql安装包传到centos系统中
- 使用sftp将mysql安装包传到/root 目录下
- 也可使用scp传
bashscp mysql-8.0.16-2.el7.x86_64.rpm-bundle.tar root@192.168.6.135:/root
- 安装mysql
bashtar xf mysql-8.0.16-2.el7.x86_64.rpm-bundle.tar -C /opt/
cd /opt
yum localinstall *
- mysql基础配置
systemctl start mysqld
systemctl enable mysqld
grep "password" /var/log/mysqld.log
mysql -u root -p
ALTER USER 'root'@'localhost' IDENTIFIED BY 'Gyc0109@123';
systemctl start mysqld: 启动MySQL服务。systemctl enable mysqld: 设置MySQL服务开机自启动。grep "password" /var/log/mysqld.log: 在MySQL日志文件中查找包含"password"的内容。mysql -u root -p: 使用root用户身份登录MySQL数据库。ALTER USER 'root'@'localhost' IDENTIFIED BY 'Gyc0109@123';: 更改MySQL中root用户在本地主机上的密码为Gyc0109@123。
配置主从复制
注意
mysql 5.6以后的复制引入了uuid的概念,各个复制结构中的server_uuid得保证不一 样,但是查看到直接copy data文件夹后server_uuid是相同的,
show variables like '%server_uuid%';
解决办法:找到/var/lib/mysql文件夹下的auto.cnf文件,修改里面的uuid值,保证 各个db的uuid不一样,重启db即可
systemctl restart mysqld.service
配置主数据库
修改配置
bash```bash vim /etc/my.cnf server-id=134 log-bin=mysql-bin systemctl restart mysqld
创建复制账号
sqlcreate user 'copy'@'%' identified with mysql_native_password by 'Gyc0109@123';
GRANT REPLICATION SLAVE ON *.* TO 'copy'@'%';
flush privileges;
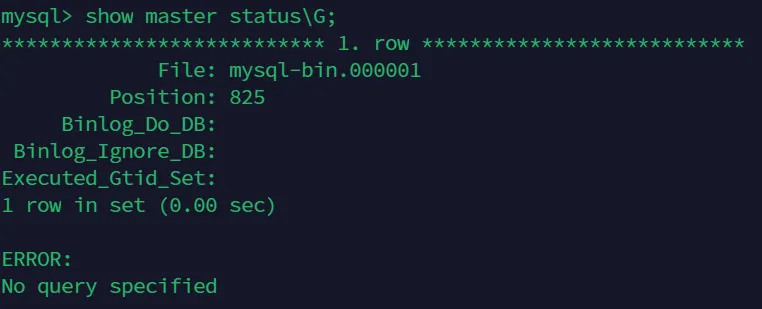
查看主服务器状态
sqlshow master status\G;
配置从服务器
修改配置
- mysql_02
bashvim /etc/my.cnf
server-id=135
relay_log = mysql-relay
read_only = 1
log_bin = mysql-bin

systemctl restart mysqld
- mysql_03
bashvim /etc/my.cnf
server-id=136
relay_log = mysql-relay
read_only = 1
log_bin = mysql-bin

systemctl restart mysqld
启动从服务器复制线程
sqlCHANGE MASTER TO
master_host = '192.168.6.134',
master_user = 'copy',
master_password = 'Gyc0109@123',
master_log_file = 'mysql-bin.000001',
master_log_pos = 825;

- 执行
start slave;启动复制线程。
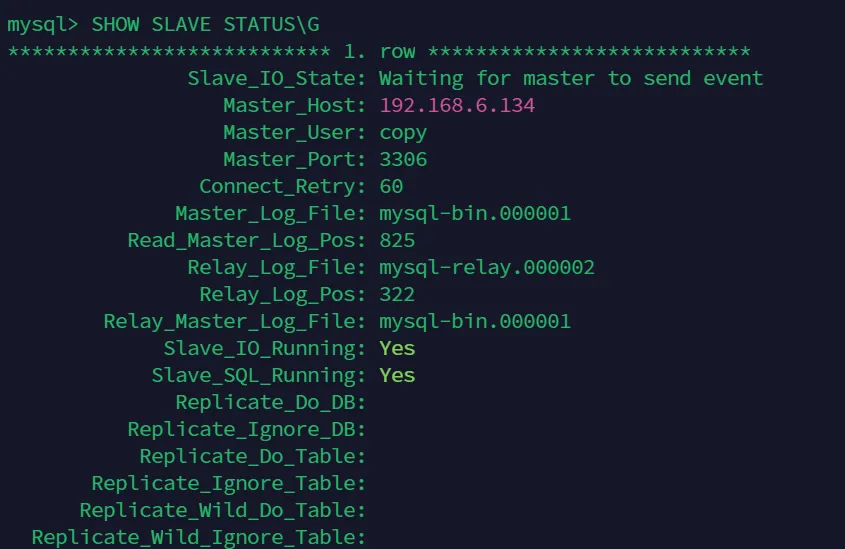
查看从服务器状态
bashSHOW SLAVE STATUS\G
测试主从复制是否成功
- 在主数据库创建数据库
sqlshow databases;
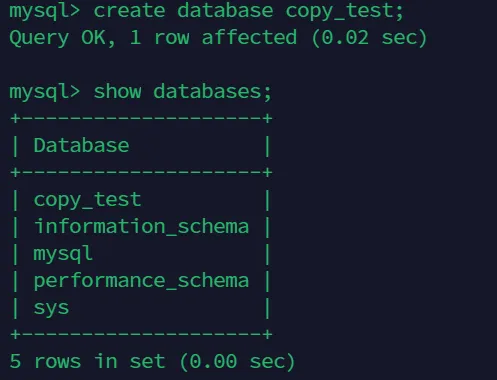
- 在从服务器中查看数据库是否存在
show databases;

应用层 - Web 服务器 搭建 WordPress
(两台web服务器)前期环境准备
安装php
bashyum install php php-fpm php-cli php-common php-gd php-mbstring php-mysql php-pdo php-devel phpxmlrpc php-xml php-bcmath php-dba php-enchant -y
- 使用
php -v查看是否安装成功, 安装成功则输出版本号
CentOS升级php
- centos 默认yum安装的php版本过低, 不符合wordpress的环境要求, 因此需要升级php版本
bash// 添加 Remi 存储库
yum install -y yum-utils
yum install -y epel-release
yum install -y http://rpms.remirepo.net/enterprise/remi-release-7.rpm

// 启用所需的 PHP 版本
yum-config-manager --enable remi-php74

// 升级 PHP
yum install -y php php-fpm php-cli php-common php-gd php-mbstring php-mysqlnd php-pdo php-xml php-xmlrpc php-bcmath php-dba php-enchant

// 检查 PHP 版本
php -v
安装Nginx
- nginx官网
- 这里使用yum安装nginx
- 配置nginx yum源
bashyum install yum-utils
cd /etc/yum.repos.d/
vim nginx.repo

[nginx-stable]
name=nginx stable repo
baseurl=http://nginx.org/packages/centos/$releasever/$basearch/
gpgcheck=1
enabled=1
gpgkey=https://nginx.org/keys/nginx_signing.key
module_hotfixes=true

[nginx-mainline]
name=nginx mainline repo
baseurl=http://nginx.org/packages/mainline/centos/$releasever/$basearch/
gpgcheck=1
enabled=0
gpgkey=https://nginx.org/keys/nginx_signing.key
module_hotfixes=true

yum clean all
yum makecache
- 安装nginx
bashyum install nginx -y
- 测试
bashnginx -v
- 如果输出版本号则安装成功
- 启动nginx服务
bashsystemctl start nginx
- 访问自己IP/域名的80(默认)端口
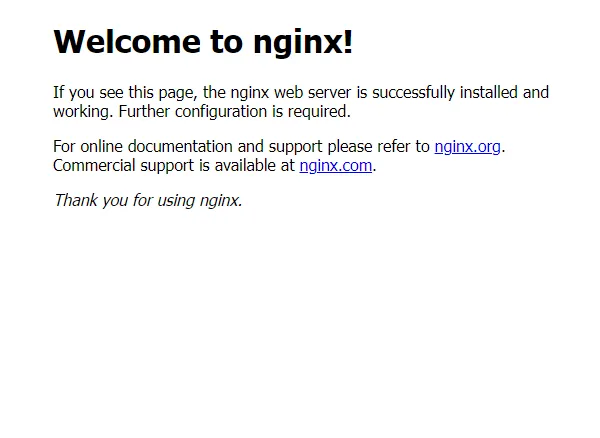
使nginx支持php
- 修改nginx配置文件
bashcd /etc/nginx/conf.d/
vim default.conf

# pass the PHP scripts to FastCGI server listening on 127.0.0.1:9000
#
location ~ \.php$ {
    root /usr/share/nginx/html;
    fastcgi_pass   127.0.0.1:9000;
    fastcgi_index  index.php;
    # fastcgi_param  SCRIPT_FILENAME  /scripts$fastcgi_script_name;
    fastcgi_param  SCRIPT_FILENAME  $document_root$fastcgi_script_name;
    include        fastcgi_params;
}
- 创建测试文件
vim /usr/share/nginx/html/index.php
<?php
phpinfo();
?>
- 重新启动nginx和php-fpm服务
bashsystemctl restart php-fpm
systemctl restart nginx
- 测试
- 浏览器输入
IP/index.php
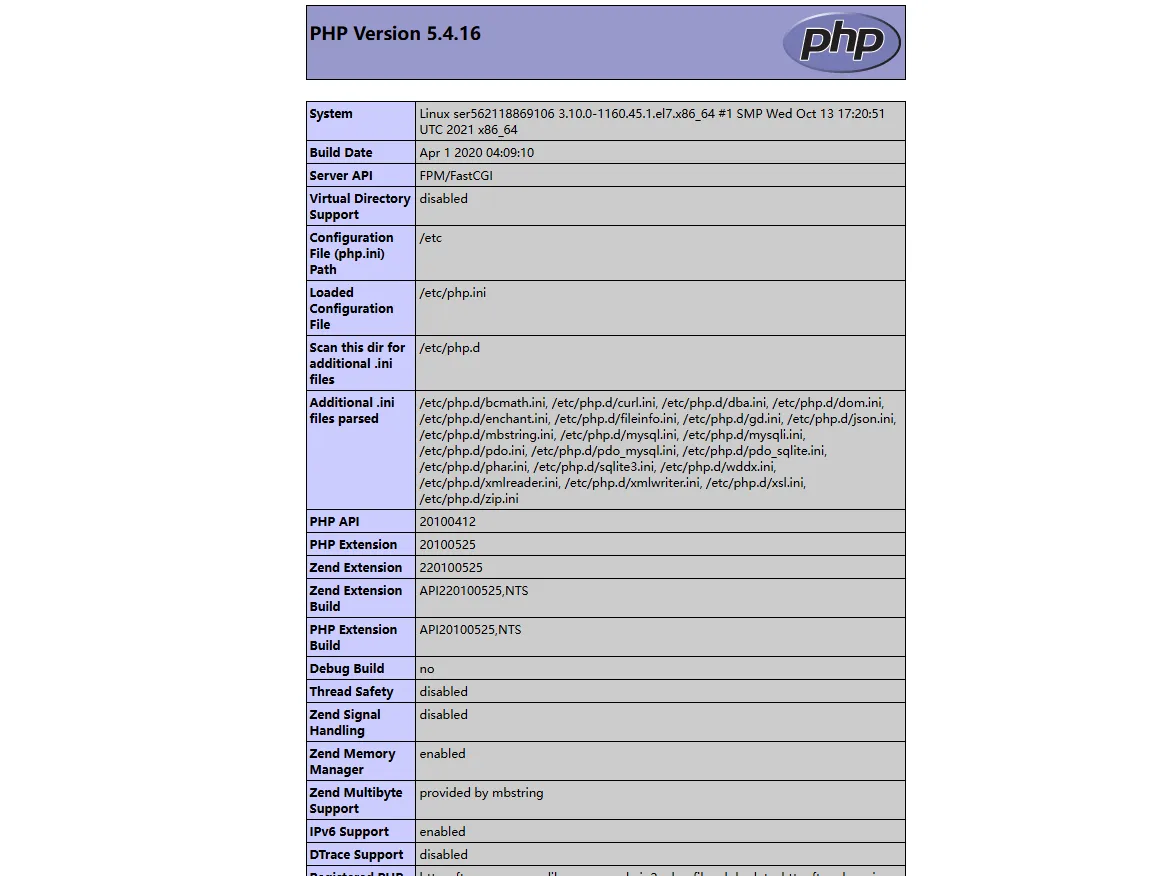
- 出现此页面即为成功
安装WordPress 相关准备
(主数据库服务器)配置Mysql
开启mysql远程访问
-
创建用户:
sqlCREATE USER 'root'@'%' IDENTIFIED BY 'Gyc0109@123';- 'Gyc0109@123'是root用户的密码
- '%'代表所有主机,也可以具体到某个主机的IP地址
-
授权所有主机通过root用户进行访问:
sqlGRANT ALL PRIVILEGES ON *.* TO 'root'@'%' WITH GRANT OPTION;- 第一个 * 表示所有数据库
- 第二个 * 表示所有表
- . 表示所有数据库中的所有表
-
刷新权限:
sqlFLUSH PRIVILEGES;
创建数据库
sqlcreate database wordpress;
mysql> show databases;
+--------------------+
| Database           |
+--------------------+
| information_schema |
| mysql              |
| performance_schema |
| sys                |
| wordpress          |
+--------------------+
5 rows in set (0.01 sec)
配置nginx
bashcd /etc/nginx/conf.d/
vim default.conf

server {
    listen       80;
    server_name  localhost;

    location / {
        root   /www/wordpress;
        index  index.php index.html index.htm;
    }

    location ~ \.php$ {
        root           /www/wordpress;
        fastcgi_pass   127.0.0.1:9000;
        fastcgi_index  index.php;
        fastcgi_param  SCRIPT_FILENAME  $document_root$fastcgi_script_name;
        include        fastcgi_params;
    }
}
- 参照上述配置修改nginx配置
- 使用
nginx -t检查nginx配置 - 创建目录
mkdir /www
(两台web服务器)安装并配置WordPress
- WordPress官网
- 按照自己的mysql、php和nginx版本选择合适的WordPress版本
- 我的版本是WordPress-6.6.1
下载并解压安装WordPress
- 使用sftp将下载好的安装包传到CentOS中
- 或者使用
wget https://cn.wordpress.org/wordpress-6.6.1-zh_CN.tar.gz下载
bashtar -zxf wordpress-6.6.1-zh_CN.tar.gz
mv wordpress /www
配置WordPress
bashcd /www/wordpress/
cp wp-config-sample.php wp-config.php
vim wp-config.php

//根据自己设置的数据库,对应修改下面配置

/** The name of the database for WordPress */
define( 'DB_NAME', 'wordpress' );

/** Database username */ 用户名
define( 'DB_USER', 'root' );

/** Database password */ 密码
define( 'DB_PASSWORD', 'Gyc0109@123' );

/** Database hostname */ ('192.168.6.134'为主数据库IP)
define( 'DB_HOST', '192.168.6.134' );

/** Database charset to use in creating database tables. */
define( 'DB_CHARSET', 'utf8' );

/** The database collate type. Don't change this if in doubt. */
define( 'DB_COLLATE', '' );
重启服务
bashsystemctl restart php-fpm
systemctl restart nginx
-
访问web01服务器IP:

-
访问web02服务器IP:

负载均衡层
(两台lb服务器)前期环境准备
- 两台服务器均安装HAProxy 和 Keepalived
bashyum install haproxy keepalived ipvsadm -y
(两台lb服务器)配置HAProxy
bashvim /etc/haproxy/haproxy.cfg
    log         127.0.0.1 local2 info
- 将此配置注释掉
- 可以使用vim 命令行模式下ctrl+v 选中行 后使用shift+i 输入#+空格 注释掉选中行
- 也可以使用vim 命令行模式下,输入 " : 首行号,尾行号 s /^/字符/g "实现批量插入字符。如 输入:.,$s/^/#/g,在光标所在行到尾行首插入#
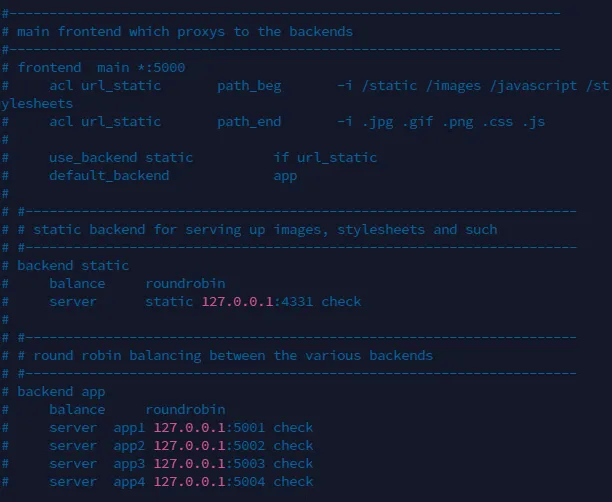
- 在配置行尾输入
bashfrontend web_lb #前台
        bind *:80
        stats uri /ha_stats
        default_backend web_back

backend web_back #后台负载均衡
        balance roundrobin
        server web01 192.168.6.137:80 check weight 1
        server web02 192.168.6.138:80 check weight 1
- 重启haproxy服务并查看状态
bashsystemctl restart haproxy
systemctl status haproxy
- 在浏览器输入lb服务器IP可以直接跳转到web页面


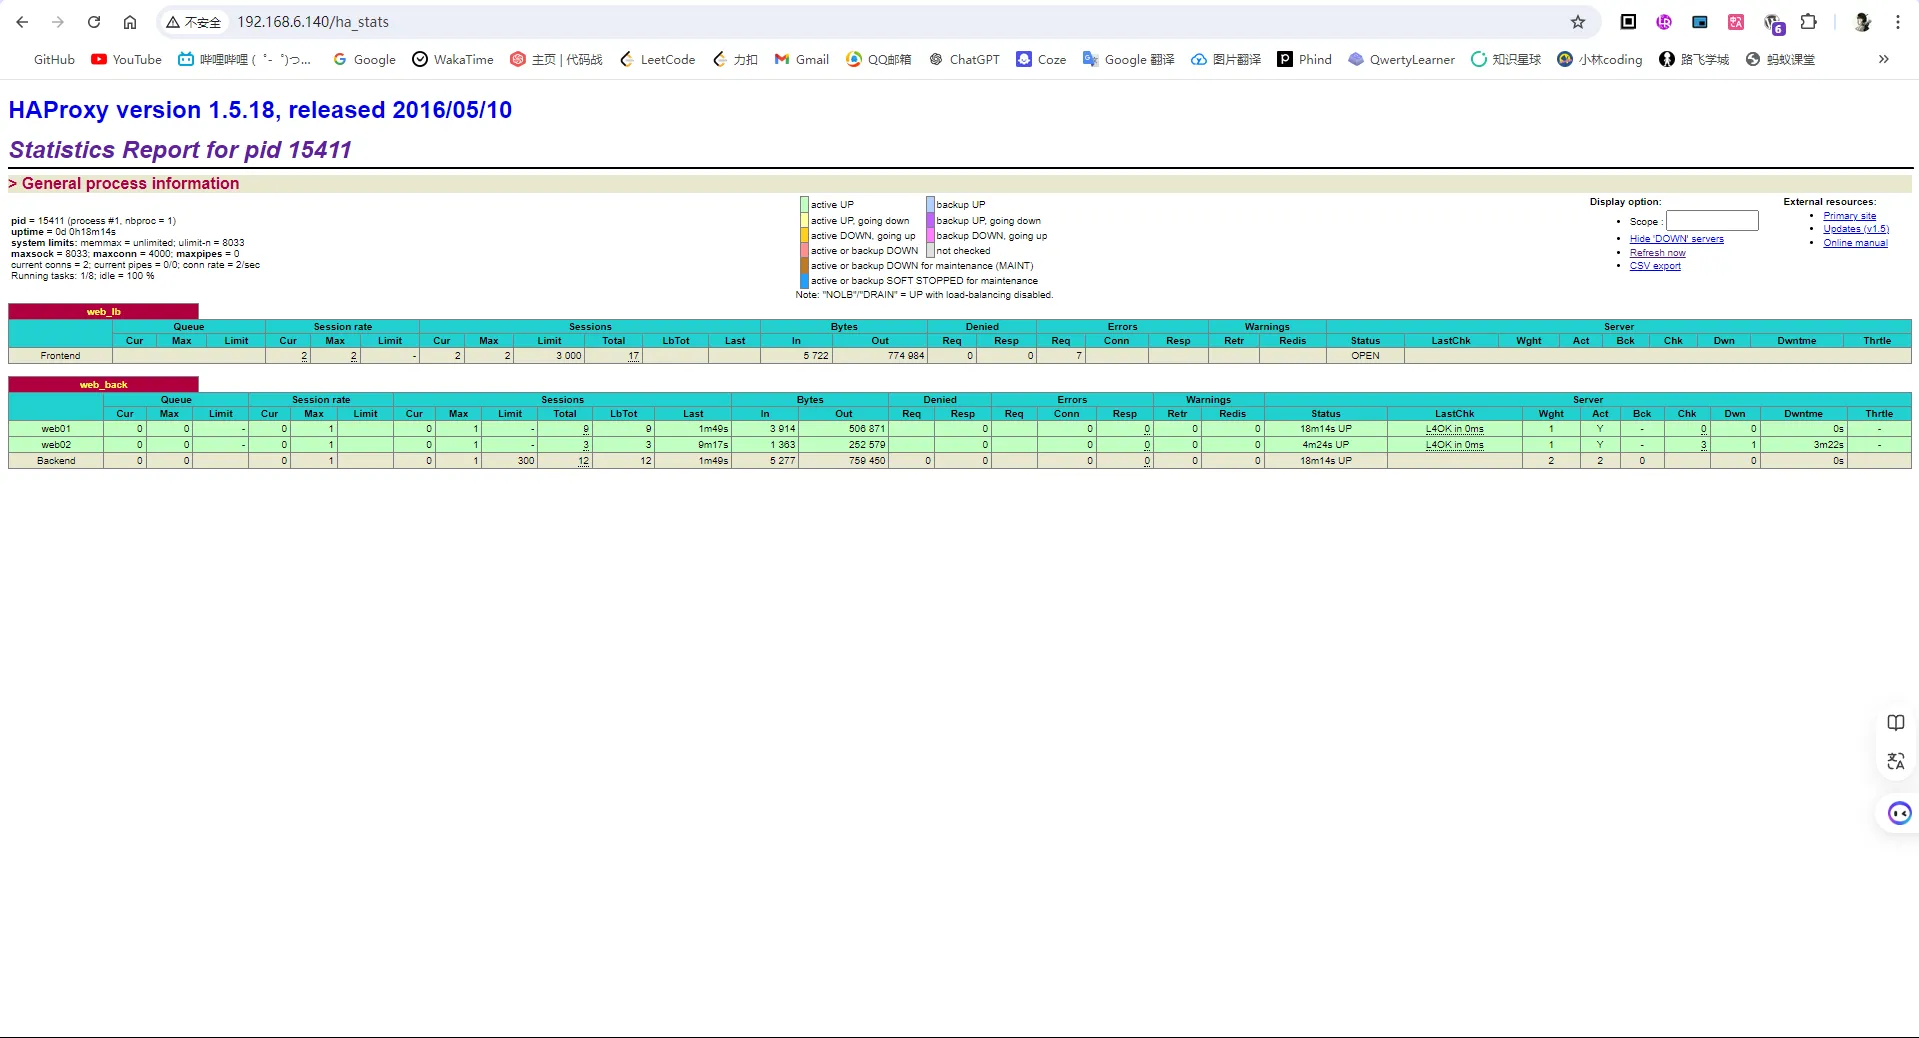
- 浏览器输入lb服务器IP/ha_stats访问这个url访问haproxy的状态报告页面

(两台lb服务器)配置Keepalived
bashcp /etc/keepalived/keepalived.conf /etc/keepalived/keepalived.conf.bak
vim /etc/keepalived/keepalived.conf
- 主Keepalived配置
bash
```bash
! Configuration File for keepalived

global_defs {
    router_id director1  # 辅助改为director2
}

vrrp_script check_haproxy {
    script "/etc/keepalived/check_haproxy_status.sh"
    interval 5
}

vrrp_instance VI_1 {
    state MASTER
    nopreempt
    interface ens33  # VIP绑定接口
    virtual_router_id 80  # MASTER,BACKUP一致
    priority 100  # 辅助改为50
    advert_int 1
    authentication {
        auth_type PASS
        auth_pass 1111
    }
    virtual_ipaddress {
        192.168.6.131  # 虚拟IP
    }

    track_script {
        check_haproxy
    }
}
- 备Keepalived配置
bash! Configuration File for keepalived

global_defs {
    router_id director2  # 辅助改为director2
}

vrrp_script check_haproxy {
    script "/etc/keepalived/check_haproxy_status.sh"
    interval 5
}

vrrp_instance VI_1 {
    state MASTER
    nopreempt
    interface ens33  # VIP绑定接口
    virtual_router_id 80  # MASTER,BACKUP一致
    priority 50  # 辅助改为50
    advert_int 1
    authentication {
        auth_type PASS
        auth_pass 1111
    }
    virtual_ipaddress {
        192.168.6.131  # 虚拟IP
    }

    track_script {
        check_haproxy
    }
}
- 对调度器Haproxy健康检查
让Keepalived以一定时间间隔执行一个外部脚本,脚本的功能是当Haproxy失败,则关闭 本机的Keepalived
bashvim /etc/keepalived/check_haproxy_status.sh
#!/bin/bash
/usr/bin/curl -I http://localhost &>/dev/null
if [ $? -ne 0 ]; then
    /etc/init.d/keepalived stop
fi
- 启动keepalived服务
bashsystemctl start keepalived
验证是否生效
使用ip addr命令

可以看到此时虚拟ip在master服务器上
- 将master主机上的keepalived服务停止后

发现此时虚拟IP出现在了BackUp备机上
使用虚拟ip访问页面

- 也可使用 虚拟IP/ha_stats访问这个url访问haproxy的状态报告页面

如果对你有用的话,可以打赏哦
打赏


本文作者:GYC
本文链接:
版权声明:本博客所有文章除特别声明外,均采用 BY-NC-SA 许可协议。转载请注明出处!
目录
